Basic Usage
Opening the Chat Panel
You can open the Agent Console chat panel in two ways:
- Ribbon Icon: Click the robot icon in the left ribbon
![]()
- Command Palette: Open the command palette (
Cmd/Ctrl + P) and search for "Open chat"
The chat panel opens in the right sidebar.
Sending Messages
- Type your message in the input field at the bottom
- Press
Enteror click the send button - Wait for the agent's response
Sending Images and Files
You can attach images and files to your messages by pasting or dragging and dropping.
- Paste: Copy a file or image and paste (
Cmd/Ctrl + V) in the input field - Drag and Drop: Drag files directly onto the input area
Attached files appear as thumbnails or file icons below the text area. Click the × to remove.
TIP
Embedding images requires agent support. Non-image files are always sent as file path references.
See Sending Images and Files for more details.
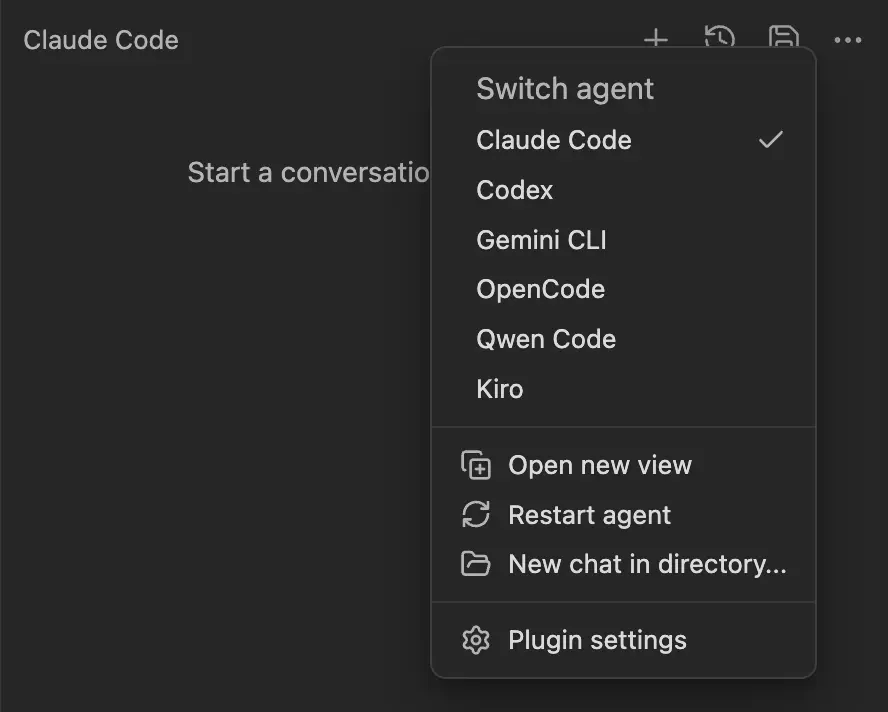
Switching Agents
To switch agents for the current view:
- Click the ⋮ (ellipsis) menu in the chat header
- Under "Switch agent", select the agent you want to use
This is a one-time change for that view only.
TIP
To change the default agent for new chat views, go to Settings → Agent Console → Default agent.

Multiple Chat Views
You can open multiple chat views to run independent conversations simultaneously. Each view has its own agent process and session.
See Tabbed Sessions for details on:
- Opening multiple views
- Broadcast commands
- Focus navigation
Changing Models and Modes
Below the input field, you'll find dropdowns to:
- Change Model: Switch between different AI models (e.g., Sonnet, Haiku for Claude)
- Change Mode: Switch agent modes (e.g., Plan Mode)
TIP
Available models and modes depend on the active agent.
Starting a New Chat
Click the + button in the tab bar to open a new tab with a fresh conversation, or run New chat from the command palette. The previous chat can optionally be exported (see Settings).
Reloading a Session
The header ↻ Reload button reloads the current session under a fresh agent process — the agent restarts and its MCP servers reload, mirroring a browser's refresh. Shift-click to Restart with a fresh, empty session instead. See Reloading a session for Reload vs. Restart.
Stopping Generation
If the agent is generating a response and you want to stop it, click the Stop button that appears during generation.